概要
在本课程中,我们将处理将整体应用迁移到超级图中迈出的第一步。我们将从将整体服务器转换为单个子图开始,它将在不同的端口上运行。同时,我们还将:
- 回顾如何利用Apollo Server创建子图
- 将我们第一个子图发布到GraphOS

✅ 服务检查
让我们确保所有进程仍在从上一课运行。
- 一个终端应运行
npm start,以在端口 4000 上启动整体服务器。 - 另一个终端应运行
npm run launch,以在端口 4010 和 4011 上的整体目录中启动我们的服务。
✏️ 导入包
让我们使用
CTRL+C停止主整体服务器进程。然后,安装
@apollo/subgraph包。整体npm install @apollo/subgraph此目录包含一个
index.js文件,它正在运行我们的整体服务器。让我们对其进行一些调整,以将其转换为整体 子图 服务器。为了使此服务器成为 子图,我们需要从
@apollo/subgraph包导入buildSubgraphSchema方法。将以下行添加到index.js文件中的导入:整体/index.jsconst { buildSubgraphSchema } = require("@apollo/subgraph");
✏️ 更新 monolith 服务器
接下来,让我们修改我们的 ApolloServer 实例。现在,我们将 typeDefs 和 resolvers 直接传递给 ApolloServer 构造函数。
const server = new ApolloServer({typeDefs,resolvers,});
要将此服务器转换为 子图,让我们在构造函数中定义一个 模式 属性。我们将使用 buildSubgraphSchema 方法,就像在第一课程中所做的那样,将包含 typeDefs 和 resolvers的对象传递给它。
const server = new ApolloServer({schema: buildSubgraphSchema({typeDefs,resolvers,}),});
在此期间,我们还将设置服务器监听端口 4001(与它最初运行的端口不同!)。我们希望 整体 子图 使用不同的端口,因为正如我们在迁移计划中所概述的那样,我们将设置 GraphOS 路由器 接管端口 4000。通过这种方式,客户端无需进行任何更改,即可与 GraphQL 服务器进行通信。
设置服务器的 listen 函数在端口上运行 4001。
- const port = 4000;+ const port = 4001;
✏️Federation 2 子图模式定义
对于该 子图,我们希望确保选择使用最新的 Federation 2 功能。打开 schema.graphql 文件,该文件位于同一 整体 目录中,并在顶部添加以下代码段:
extend schema@link(url: "https://specs.apollo.dev/federation/v2.7",import: ["@key"])
通过此行,我们可以指定我们希望在模式文件中使用的各种 指令(例如 @key,如 import 中所示)。
有了它,我们就可以重新启动我们的 整体 服务器进程了!
npm start
我们在控制台中会看到一些输出,然后是消息“🚀 服务器已准备就绪,请访问 https://:4001/”。
测试 整体子图
我们访问该 URLhttps://:4001在浏览器中重新打开 Apollo Sandbox。让我们尝试在上一节课中使用相同的 查询来确保所有内容都仍按预期运行!
query GetAllAmenities {listingAmenities {categoryname}}
运行 查询后,我们可以在右侧的 响应面板中看到呈现的数据。太棒了,我们知道它有效!通过将整体架构转换为 子图,我们知道架构的所有类型、 字段和功能仍然保留和完好。
我们已经准备好第一个 子图,因此下一步是将其发布到注册表!
发布我们的子图
回想 rover subgraph publish命令如下所示:
rover subgraph publish <APOLLO_GRAPH_REF> \--schema <SCHEMA_FILE_PATH> \--name <SUBGRAPH_NAME> \--routing-url <SERVER_URL>
让我们发布这个 子图!
提示:在整个课程中,我们将使用一些不同的 Rover命令。您可以创建一个新文件来存储这些命令,并在需要时将其复制粘贴到终端,或者您可以将它们合并到脚本中以在 package.json文件中运行。
在根目录中打开一个新的终端窗口,并运行以下命令,用您自己的 APOLLO_GRAPH_REF标志值替换这些值。我们将给此 子图命名为 monolith。
rover subgraph publish <APOLLO_GRAPH_REF> \--schema ./monolith/schema.graphql \--name monolith \--routing-url https://:4001
我们将收到一条消息,询问我们是否想使用 localhost URL 发布。
The host `localhost` is not routable via the public internet.Continuing the publish will make this subgraph reachable in local environments only.Would you still like to publish? [y/N]
我们现在处于教程中,因此暂时使用本地端点。键入 y并按 Enter 键。
天哪。。。当运行命令时,我们会看到我们在终端中得到一个错误!(您将看到自己的APOLLO_GRAPH_REF 变量的值代替下面标记)
error[E007]: The graph `[APOLLO_GRAPH_REF]` is a non-federated graph.This operation is only possible for federated graphs.If you are sure you want to convert a non-federated graph to a subgraph, you can re-run the same command with a `--convert` flag.
但发生了什么问题呢?
嗯,当设置我们的图时,我们选择了一个整体式架构,这创建了一个图。这在当时适合我们的目的,但现在我们将整体式分解为子图,我们需要确保我们的图是聚合的
让我们再试一次该命令,这次包括--convert标记,正如错误消息提示的那样
rover subgraph publish <APOLLO_GRAPH_REF> \--schema ./monolith/schema.graphql \--name monolith \--routing-url https://:4001 \--convert
最后添加的--convert标记将告诉 Studio 将现有的图转换为超级图。
现在我们应该看到该命令运行成功了,并且我们的子图已经发布了!

一个子图诞生了!
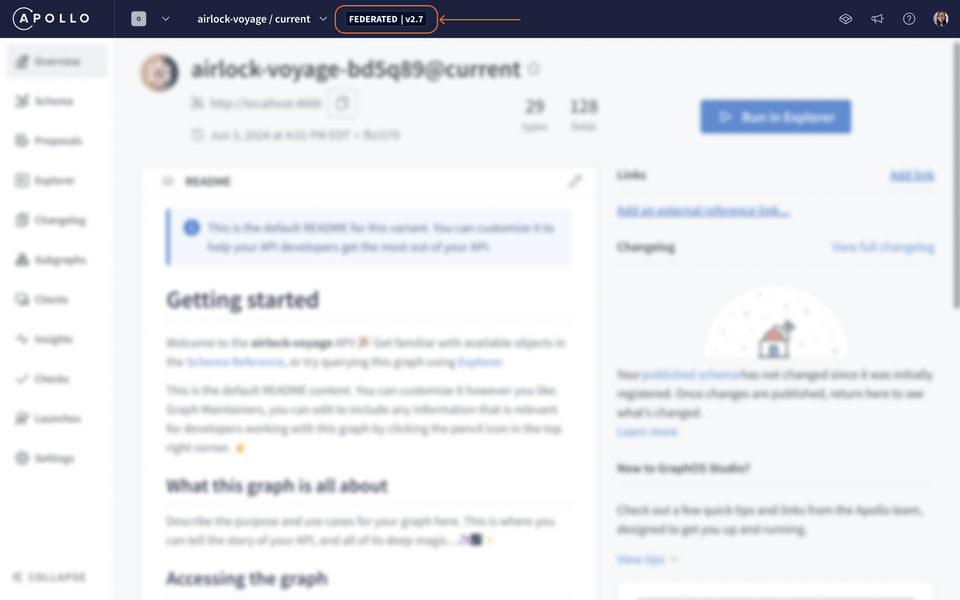
在浏览器中,我们回到 graph in Studio。我们将看到顶部会显示一个新标签,在指定联合版本的同时表明它已联合。

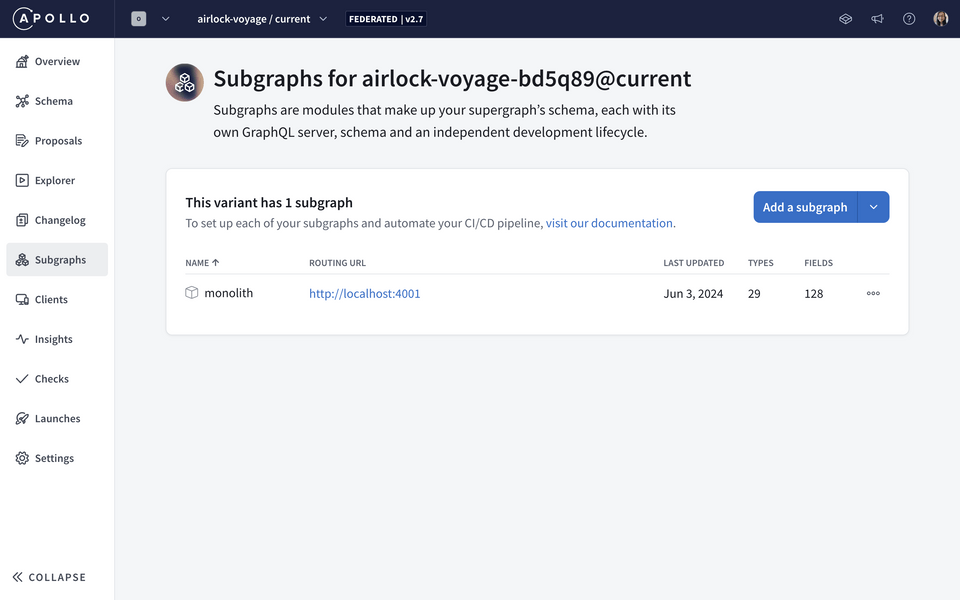
我们导航到 子图页面。我们可以看到我们有一个 子图, monolith及其实体所有详细信息。(如果您看不到 子图菜单选项,请尝试刷新页面!)

步骤 1 已经完成!
实践
关键要点
- 我们设置整体 子图以使用端口
4001,因为正如我们在迁移计划中所概述的,我们要 路由器接管端口4000。(别担心 - 我们尚未完成!)这样,客户端无需做出任何更改即可与 路由器通信。 - 要将 Studio 中的现有 graph转换为 超图,我们使用相同的
rover subgraph publish命令来发布架构,并添加--convert标志。
接下来
让我们回顾迁移计划。第一步已经成功完成,接下来我们看看还有哪些工作。
- ✅ 将整体 GraphQL 服务器转换为子图服务器,我们将在不同端口上运行该服务器。此子图将发布到架构注册表中。

➡️ 创建一个在整体服务器原始端口上运行的路由器。该路由器将连接到架构注册表,并将处理之前发送到整体服务器的所有查询。
开始将我们的单个整体 子图拆分为新的特定于域的子图。这需要执行几个步骤,我们稍后会详细说明。
下一步是配置 GraphOS 路由器。此路由器需要在 Airlock 中处理身份验证和授权,因此让我们在下一课学习它是如何工作的。
分享你对这节课的问题和评论
你的反馈有助于我们改进!如果你遇到困难或困惑,请告诉我们,我们将帮助你。所有评论都是公开的,并且必须遵守 Apollo 行为准则。请注意,已解决或解答的评论可能会被删除。
你需要一个 GitHub 帐户才能在下面发表评论。没有 GitHub 帐户? 改为在我们的 Odyssey 论坛中发表评论。