概述
我们已经看到了特定且表达能力强的查询的强大功能,这些查询可以让我们一次性检索到我们想要的确切数据。但是查询 在 GraphQL 中只是等式的一部分。
当我们想要实际更改、插入或删除数据时,我们需要使用新的工具: GraphQL 变异。
在本课中,我们将
- 探索 变异 语法并编写一个 操作 来创建一个新的房源
- 了解 GraphQL
input类型 - 了解 变异 响应最佳实践
Airlock 中的变异
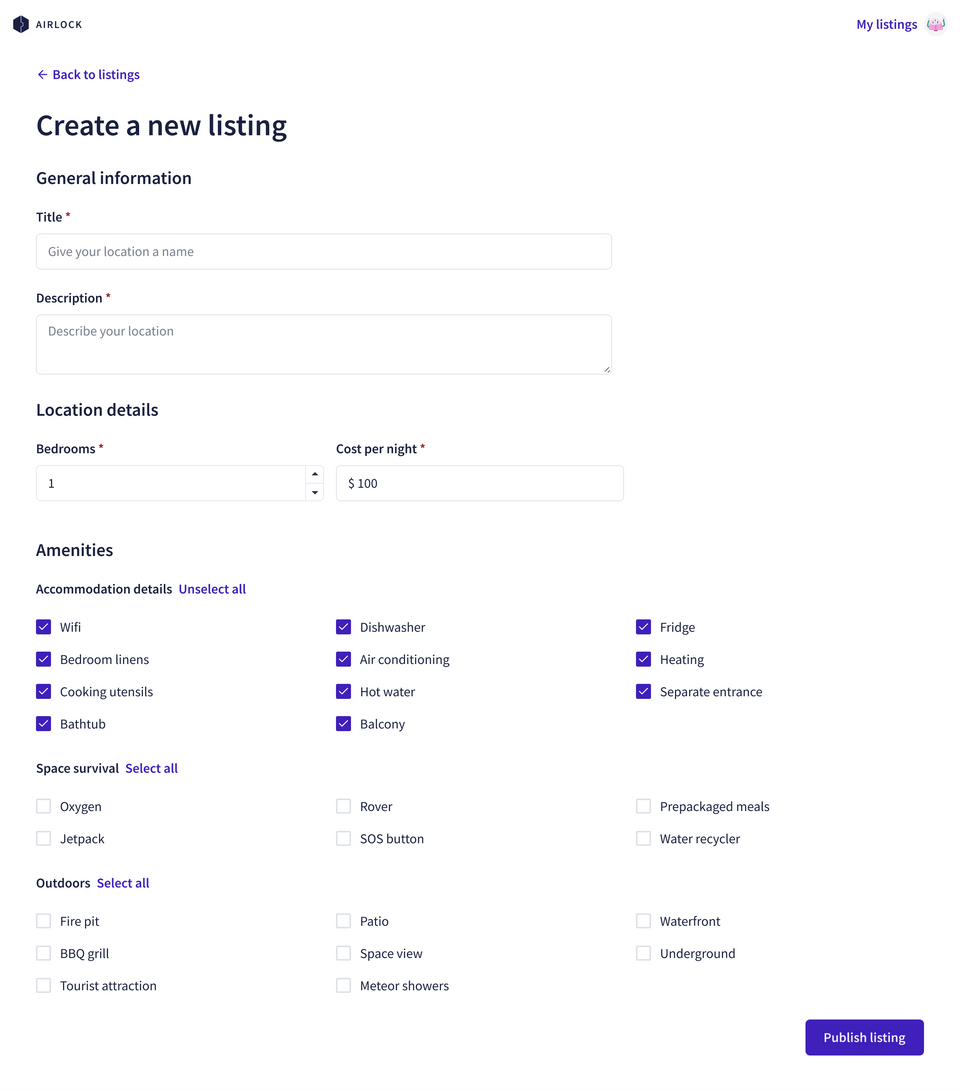
继续我们的 Airlock API 中的下一个功能:创建新的房源。

我们的 REST API 配备了一个端点,允许我们创建新的房源: POST /listings。
此方法接受我们请求主体上的 listing 属性。它应该包含与房源相关的所有属性,包括其便利设施。房源在数据库中创建后,此端点会将新创建的房源返回给我们。
好的,现在如何在 GraphQL 中启用此功能?
设计变异
就像 Query 类型一样,Mutation 类型是我们的 Schema 的入口点。它遵循与我们到目前为止一直在使用的 Schema 定义语言 或 SDL 相同的语法。
我们使用 type 关键字声明 Mutation 类型,然后是名称 Mutation。在大括号内,我们有我们的入口点,即用于修改数据的 字段。
让我们打开 schema.graphql 并添加一个新的 Mutation 类型。
type Mutation {}
对于 字段 的 Mutation,我们建议从一个描述更新 操作 的特定操作的动词开始(例如 add、delete 或 create),然后是 变异 操作的数据。
我们将探索如何 创建 一个新的房源,因此我们将调用此 变异 createListing。
type Mutation {"Creates a new listing"createListing: #TODO}
对于 createListing 的返回类型 变异,我们 可以 返回 Listing 类型;它是我们希望 变异 操作的 对象类型。但是,我们建议遵循 变异 响应的统一 Response 类型。让我们看看它在一个新的类型中是什么样子。
Mutation 响应类型
的返回类型 Mutation 字段 通常以 变异 的名称开头,后跟 Payload 或 Response。不要忘记类型名称应该用 PascalCase 格式化!
按照惯例,我们将我们的类型命名为 CreateListingResponse。
type CreateListingResponse {}
我们应该返回我们正在修改的 对象类型(在本例中为 Listing),以便客户端可以访问更新后的对象。
type CreateListingResponse {listing: Listing}
注意:虽然我们的 变异 操作单个 Listing 对象,但 变异 也可以一次更改和返回多个对象。
请注意,listing 的 字段 返回一个 Listing 类型,该类型 可以 为 null,因为我们的 变异 可能失败。
为了解决可能发生的任何部分错误并向客户端返回有用的信息,我们可以包含一些额外的 字段 在响应类型中。
code:一个Int,它指的是响应的状态,类似于 HTTP 状态代码。success:一个Boolean标志,指示 变异 负责的所有更新是否成功。message:一个String,用于在客户端显示有关 变异 结果的信息。如果变异仅部分成功并且通用错误消息无法说明全部情况,这特别有用。
让我们也为这些 字段 添加注释,以便使我们的 GraphQL API 文档更有用。
type CreateListingResponse {"Similar to HTTP status code, represents the status of the mutation"code: Int!"Indicates whether the mutation was successful"success: Boolean!"Human-readable message for the UI"message: String!"The newly created listing"listing: Listing}
最后,我们可以将我们 变异 的返回类型设置为这种新的 CreateListingResponse 类型,并使其不可为空。以下是 createListing 的 变异 应该是什么样子:
type Mutation {"Creates a new listing"createListing: CreateListingResponse!}
Mutation 输入
为了创建一个新的房源,我们的 变异 需要接收一些输入。
让我们考虑一下这个 createListing mutation 会期望什么样的输入。我们需要房源本身的所有详细信息,例如 title、costPerNight、numOfBeds、amenities 等等。
我们之前在 Query.listing field 中使用过一个 GraphQL argument : 我们传递了一个名为 id 的单个 argument。
type Query {listing(id: ID!): Listing}
但是 createListing 接受多个 argument。我们可以解决这个问题的一种方法是将每个参数逐一添加到我们的 createListing mutation 中。但是这种方法可能会变得笨拙且难以理解。相反,使用 GraphQL 输入类型作为 arguments ,对于 field 来说是一个好习惯。
探索 input 类型
在 input 类型中 GraphQL schema 是一个特殊的 object type ,它将一组 arguments 组合在一起,然后可以作为另一个 field 的参数使用。使用 input 类型有助于我们对 arguments 进行分组和理解,特别是对于 mutations。
要定义输入类型,请使用 input 关键字,后跟名称和花括号 ({})。在花括号内,我们像往常一样列出 fields 和类型。请注意,输入类型的字段只能是 scalar、枚举或其他输入类型。
input CreateListingInput {}
接下来,我们将添加属性。为了完善我们将要创建的房源,让我们发送所有相关详细信息。我们需要:title、description、numOfBeds、costPerNight 和 closedForBookings。
input CreateListingInput {"The listing's title"title: String!"The listing's description"description: String!"The number of beds available"numOfBeds: Int!"The cost per night"costPerNight: Float!"Indicates whether listing is closed for bookings (on hiatus)"closedForBookings: Boolean}
我们还需要指定我们的房源提供的 amenities。请注意,我们在创建新房源的模型中,便利设施选项是预定义的;我们只能从现有选项中选择。在幕后,这些便利设施中的每一个都有一个唯一的 ID 标识符。出于这个原因,我们将添加一个 amenityIds field 到 CreateListingInput 中,类型为 [ID!]!。
input CreateListingInput {"The listing's title"title: String!"The listing's description"description: String!"The number of beds available"numOfBeds: Int!"The cost per night"costPerNight: Float!"Indicates whether listing is closed for bookings (on hiatus)"closedForBookings: Boolean"The Listing's amenities"amenities: [ID!]!}
注意: 您可以了解有关 input 类型的更多信息,以及其他 GraphQL 类型和功能,请访问 Side Quest: Intermediate Schema Design。
使用 input
要在模式中使用 input 类型,我们可以将其设置为 field argument 的类型。例如,我们可以更新 createListing mutation 以使用 CreateListingInput 类型,如下所示:
type Mutation {"Creates a new listing"createListing(input: CreateListingInput!): CreateListingResponse!}
请注意,CreateListingInput 是非空的。要运行此 mutation,我们实际上需要一些输入!
构建 ListingAPI 方法
与其他请求一样,我们将构建一个方法来管理此 REST API 调用以创建新的房源。
回到 datasources/listing-api.ts 中,让我们为此 mutation 添加一个新方法。
createListing() {// TODO}
这次,因为端点使用的是 POST 方法,我们将使用 this.post 来自 RESTDataSource 的辅助方法,而不是 this.get。
接下来,我们将端点传递给此方法:"listings"
createListing() {return this.post("listings");}
我们的方法将接收一个新的 listing argument,其类型为 CreateListingInput。我们可以从 types.ts 导入此类型。
import { Amenity, Listing, CreateListingInput } from "../types";
然后,让我们更新 createListing 方法以接收新的房源。
createListing(listing: CreateListingInput) {// method logic}
我们可以将第二个 argument 传递给 this.post 方法以指定请求主体。现在让我们添加这些花括号,并指定一个名为 body 的属性,它是一个另一个对象。
createListing(listing: CreateListingInput) {return this.post("listings", {body: {}});}
在这个对象内,我们将传递我们的 listing。
return this.post("listings", {body: { listing },});
注意: 我们使用简写属性表示法来表示隐式键,因为我们用匹配的键 (listing) 命名了常量。
现在我们可以处理方法的返回类型。当房源成功创建时,此端点将返回一个 Promise,它解析为新创建的房源对象。因此,我们可以使用 Promise<Listing> 作为方法的返回类型。
createListing(listing: CreateListingInput): Promise<Listing> {return this.post("listings", {body: {listing}});}
在解析器中连接各个部分
跳回到 resolvers.ts 文件。我们将向 resolvers 对象添加一个新条目,名为 Mutation。
Mutation: {// TODO},
让我们添加我们的 createListing resolver。
Mutation: {createListing: (parent, args, contextValue, info) => {// TODO}},
我们不需要这里的 parent 或 info 参数,因此我们将用 _ 替换 parent 并完全删除 info。
createListing: (_, args, contextValue) => {// TODO},
我们从 Mutation.createListing 模式 field 中知道,此 resolver 将接收一个名为 input 的 argument。我们将为此属性解构 args。同时,我们也将为 contextValue 解构 dataSources 属性。
createListing: (_, { input }, { dataSources }) => {// TODO},
现在,我们将从 listingAPI data source 中调用 createListing 方法,并将我们的 input 传递给它。
createListing: (_, { input }, { dataSources }) => {dataSources.listingAPI.createListing(input);},
我们还没有从此方法返回任何内容,因此我们可能会看到一些错误。在我们的模式中,我们指定 Mutation.createListing field 应该返回一个 CreateListingResponse 类型。
type CreateListingResponse {"Similar to HTTP status code, represents the status of the mutation"code: Int!"Indicates whether the mutation was successful"success: Boolean!"Human-readable message for the UI"message: String!"The newly created listing"listing: Listing}
这意味着我们从 resolver 返回的对象需要匹配此形状。让我们先设置一下在我们的 mutation operation 成功的情况下将要返回的对象。
createListing: (_, { input }, { dataSources }) => {dataSources.listingAPI.createListing(input);// everything succeeds with the mutationreturn {code: 200,success: true,message: "Listing successfully created!",listing: null, // We don't have this value yet}},
检查响应
现在,让我们看一下 API 调用的响应。我们需要使我们的整个 resolver async,以便 await 调用 dataSources.listingAPI.createListing() 的结果。
createListing: async (_, { input }, { dataSources }) => {const response = await dataSources.listingAPI.createListing(input);console.log(response);// everything succeeds with the mutationreturn {code: 200,success: true,message: "Listing successfully created!",listing: null, // We don't have this value yet}},
在 沙盒 中,让我们一起创建一个 变异 操作。
mutation CreateListing($input: CreateListingInput!) {createListing(input: $input) {codesuccessmessage}}
并将以下内容添加到 变量 面板中。
{"input": {"title": "Mars' top destination","description": "A really cool place to stay","costPerNight": 44.0,"amenities": ["am-1", "am-2"],"numOfBeds": 2}}
当我们运行 操作 时,我们将看到此 变异 确实按预期工作!我们可以清楚地看到我们在 code、success 和 message 中为我们的成功路径设置的值。
在运行服务器的终端中,我们将看到 API 响应的日志记录:它就是我们新创建的清单!
{id: '22ff64fe-41d4-4754-acbb-22ac89e27620',title: "Mars' top destination",description: 'A really cool place to stay',costPerNight: 44,hostId: null,locationType: null,numOfBeds: 2,photoThumbnail: null,isFeatured: null,latitude: null,longitude: null,closedForBookings: null,amenities: [{id: 'am-1',category: 'Accommodation Details',name: 'Interdimensional wifi'},{ id: 'am-2', category: 'Accommodation Details', name: 'Towel' }]}
这意味着我们可以将 response 的整个值作为 listing 属性返回到我们返回的对象中。
return {code: 200,success: true,message: "Listing successfully created!",listing: response,};
现在让我们构建失败路径——当我们的 变异 没有 按预期进行时。
处理失败路径
返回到我们的 Mutation.createListing 解析器 中,我们将考虑错误状态。
我们将从将我们到目前为止编写的所有内容都包装在 try/catch 块中开始。
try {const response = await dataSources.listingAPI.createListing(input);return {code: 200,success: true,message: "Listing successfully created!",listing: response,};} catch (err) {}
在 catch 块中,我们将返回一个包含一些不同属性的对象。
try {// try block body} catch (err) {return {code: 500,success: false,message: `Something went wrong: ${err.extensions.response.body}`,listing: null,};}
以下是您的整个 解析器 函数应该看起来的样子。
为了测试我们的失败路径,让我们尝试使用一个不存在的便利设施 ID 创建一个清单。
回到 沙盒 中,让我们更新我们的 操作 以包含更多有关我们将尝试创建的清单的信息。
mutation CreateListing($input: CreateListingInput!) {createListing(input: $input) {codesuccessmessagelisting {titledescriptioncostPerNightamenities {namecategory}}}}
然后让我们更新我们的 变量 面板;这次,我们将更新清单的 "numOfBeds" 为零。
{"input": {"title": "Mars' top destination","description": "A really cool place to stay","costPerNight": 44.0,"amenities": ["am-1", "am-2"],"numOfBeds": 0}}
当我们运行 操作 时,我们将看到我们预期的值: 变异 失败,我们的错误消息也清晰可见。 Something went wrong: 503: Service Unavailable!
在我们的失败路径得到验证后,让我们还原对 变量 面板的更改——我们的清单至少需要有一张床可用!
{"input": {"title": "Mars' top destination","description": "A really cool place to stay","costPerNight": 44.0,"amenities": ["am-1", "am-2"],"numOfBeds": 2}}
现在让我们再次运行该 变异 并看看 所有 的清单数据是否都已考虑在内。
mutation CreateListing($input: CreateListingInput!) {createListing(input: $input) {codesuccessmessagelisting {titledescriptioncostPerNightamenities {namecategory}}}}
运行 查询 并... 数据!
太棒了,您做到了!
练习
CreateListingResponse) 中,为什么修改后的对象的返回类型 (Listing) 是可空的?input 类型?主要要点
- 变异 是写入 操作 用于修改数据。
- 命名 变异 通常以描述动作的动词开头,例如 "add"、"delete" 或 "create"。
- 创建一致的 变异 响应类型是一个常见约定。
- 变异 在 GraphQL 中通常需要多个 参数 来执行操作。为了将参数组合在一起,我们使用 GraphQL 输入类型来确保清晰度和可维护性。
旅程的终点
您创建了一个 GraphQL API!您有一个可以正常工作的 GraphQL 服务器,里面塞满了星际清单,它使用 REST API 作为 数据源。您已经编写了查询和 变异,并在此过程中学习了一些常见的 GraphQL 约定。您还探索了如何在模式设计中使用 GraphQL 参数、变量 和输入类型。花点时间庆祝一下;您学到了很多东西!
但旅程并没有结束!当您准备好让您的 GraphQL API 更进一步 时,请跳到本系列的下一门课程:使用 TypeScript 和 Apollo Server 的联邦。
感谢您参加本课程;希望在下一门课程中见到您!
分享您关于本课的疑问和评论
本课程目前处于
您需要一个 GitHub 帐户才能在下方发布。还没有吗? 请改在 Odyssey 论坛中发布。