概述
好极了,我们知道如何图谱 变量 在我们的开发流程中非常有用,因此,让我们来使用它们。在这一课程中,我们将:
- 创建一个
staging图谱 变量 - 了解如何将 子图模式 推送到图谱 变量
- 访问和浏览 变量 in GraphOS
创建一个 staging 变量
目前,GraphOS 路由器的暂存和生产版本都使用超图模式的生产版本。这意味着,当我们发布对暂存子图的更改后,实时生产路由器所使用的模式也会发生更改。情况不容乐观,因为如果我们的更改意外破坏了一些功能,则我们的暂存和生产路由器中的功能都会遭到破坏。我们需要一个staging graph variant用于路由器的暂存版本。
让我们了解如何创建一个staging variant。我们首先使用我们产品的staging variant 当前,处于启用状态 graph,以在添加功能之前获得基线作为参照。
要创建一个新的variant,我们将再次使用Rover CLI。事实上,你可能已经熟悉我们将使用的命令:rover subgraph publish。
你可能会想起此命令的第一个argument是graph ref。graph ref是三部分组成的:图的名称,后缀@以及variant的名称。
airlock-managed-fed@current
我们在航段 I 中使用了默认 current 变体,但我们也可以指定不同的变体。在这种情况下,我们将使用名称 staging。如果此 变体 未存在,GraphOS将为我们创建此变体。
以下是如何将 accounts 子图模式发布到 staging 变体的 图:
rover subgraph publish airlock-managed-fed@staging \--schema "accounts.graphql" \--name accounts \--routing-url "https://staging-airlock-accounts.com"
请注意, routing-url 值指向 子图的 过渡阶段环境,而不是生产环境。
在运行上述 rover subgraph publish 命令后,我们将看到终端中的以下内容:
Publishing SDL to airlock-managed-fed@staging (subgraph: accounts)using credentials from the default profile.A new subgraph called 'accounts' for the 'airlock-managed-fed@staging' graph was created.The supergraph schema for the 'airlock-managed-fed@staging' graph was updated,composed from the updated 'accounts' subgraph.
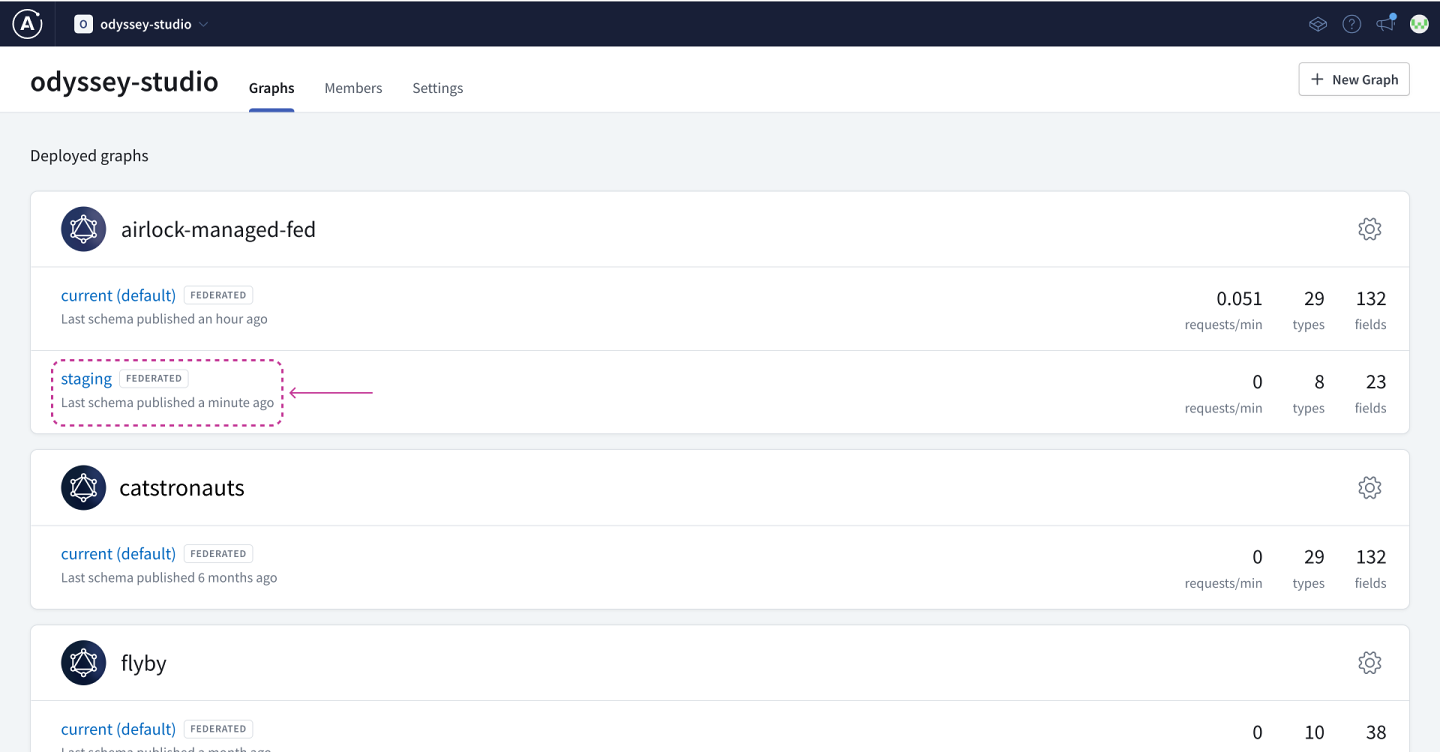
将模式发布到 staging 变体后,Studio 将反映此新添加的内容。在主页的 图的名称下,我们可以看到已添加新变体,名称为 staging。
我们可以点击新的 staging 变体来查看此 图的当前模式。到目前为止,它只包含我们刚刚注册的 accounts 子图。

除了这些,还需要注册其他所有 子图 到新的 staging variant 中: listings、 bookings、 reviews 和 payments。 schema、 name 和 routing-url 选项的值会因不同内容而异,但 graph 名称和 variant 会保持不变!
在发布其他所有 子图 之后,我们就能在 staging variant 架构中查看这些子图:

太棒了! staging graph variant 现在已经为 Airlock 设置所有 子图!现在, staging variant 架构与 current variant 架构处于完全相同的状态。在我们开始添加功能或进行架构更改之前,我们就准备好了基线。
最后,我们需要确定 staging graph variant 已连接到 staging 的端点 router。
我们可以在 变体的主页上通过点击 连接设置,并且设置用于暂存 路由器的端点 URL 来完成此操作。

一切就绪,我们准备继续对 Galactic Coordinates 项目进行更改。
实践
关键内容
- 我们可以通过使用 Rover命令
rover subgraph publish并且指定 图 变体名称在@符号之后的 图 ref中来将架构发布到特定 变体。
下一步
Listings 团队一直在努力工作,并且现在已经准备好分享他们的架构更新,以便其他团队可以开始为 Galactic Coordinates 项目做出贡献。
在下一章节中,我们将看到他们如何使用 架构检查来自信地将他们的架构更改推送到注册表。
分享你对此章节的问题和评论
你的反馈帮助我们进行改进!如果你遇到困难或困惑,请告诉我们,我们会帮助你。所有评论都是公开的,并且必须遵守 Apollo 行为准则。请注意,可能移除已解决或已处理的评论。
您需要一个 GitHub 帐号才能在下方发帖。没有吗? 改为在我们的 Odyssey 论坛中发帖。